Download: Action Button - Voice Automation
NOTE: Quick Start Tutorial on Youtube
1. Basic settings
1.1. App activation
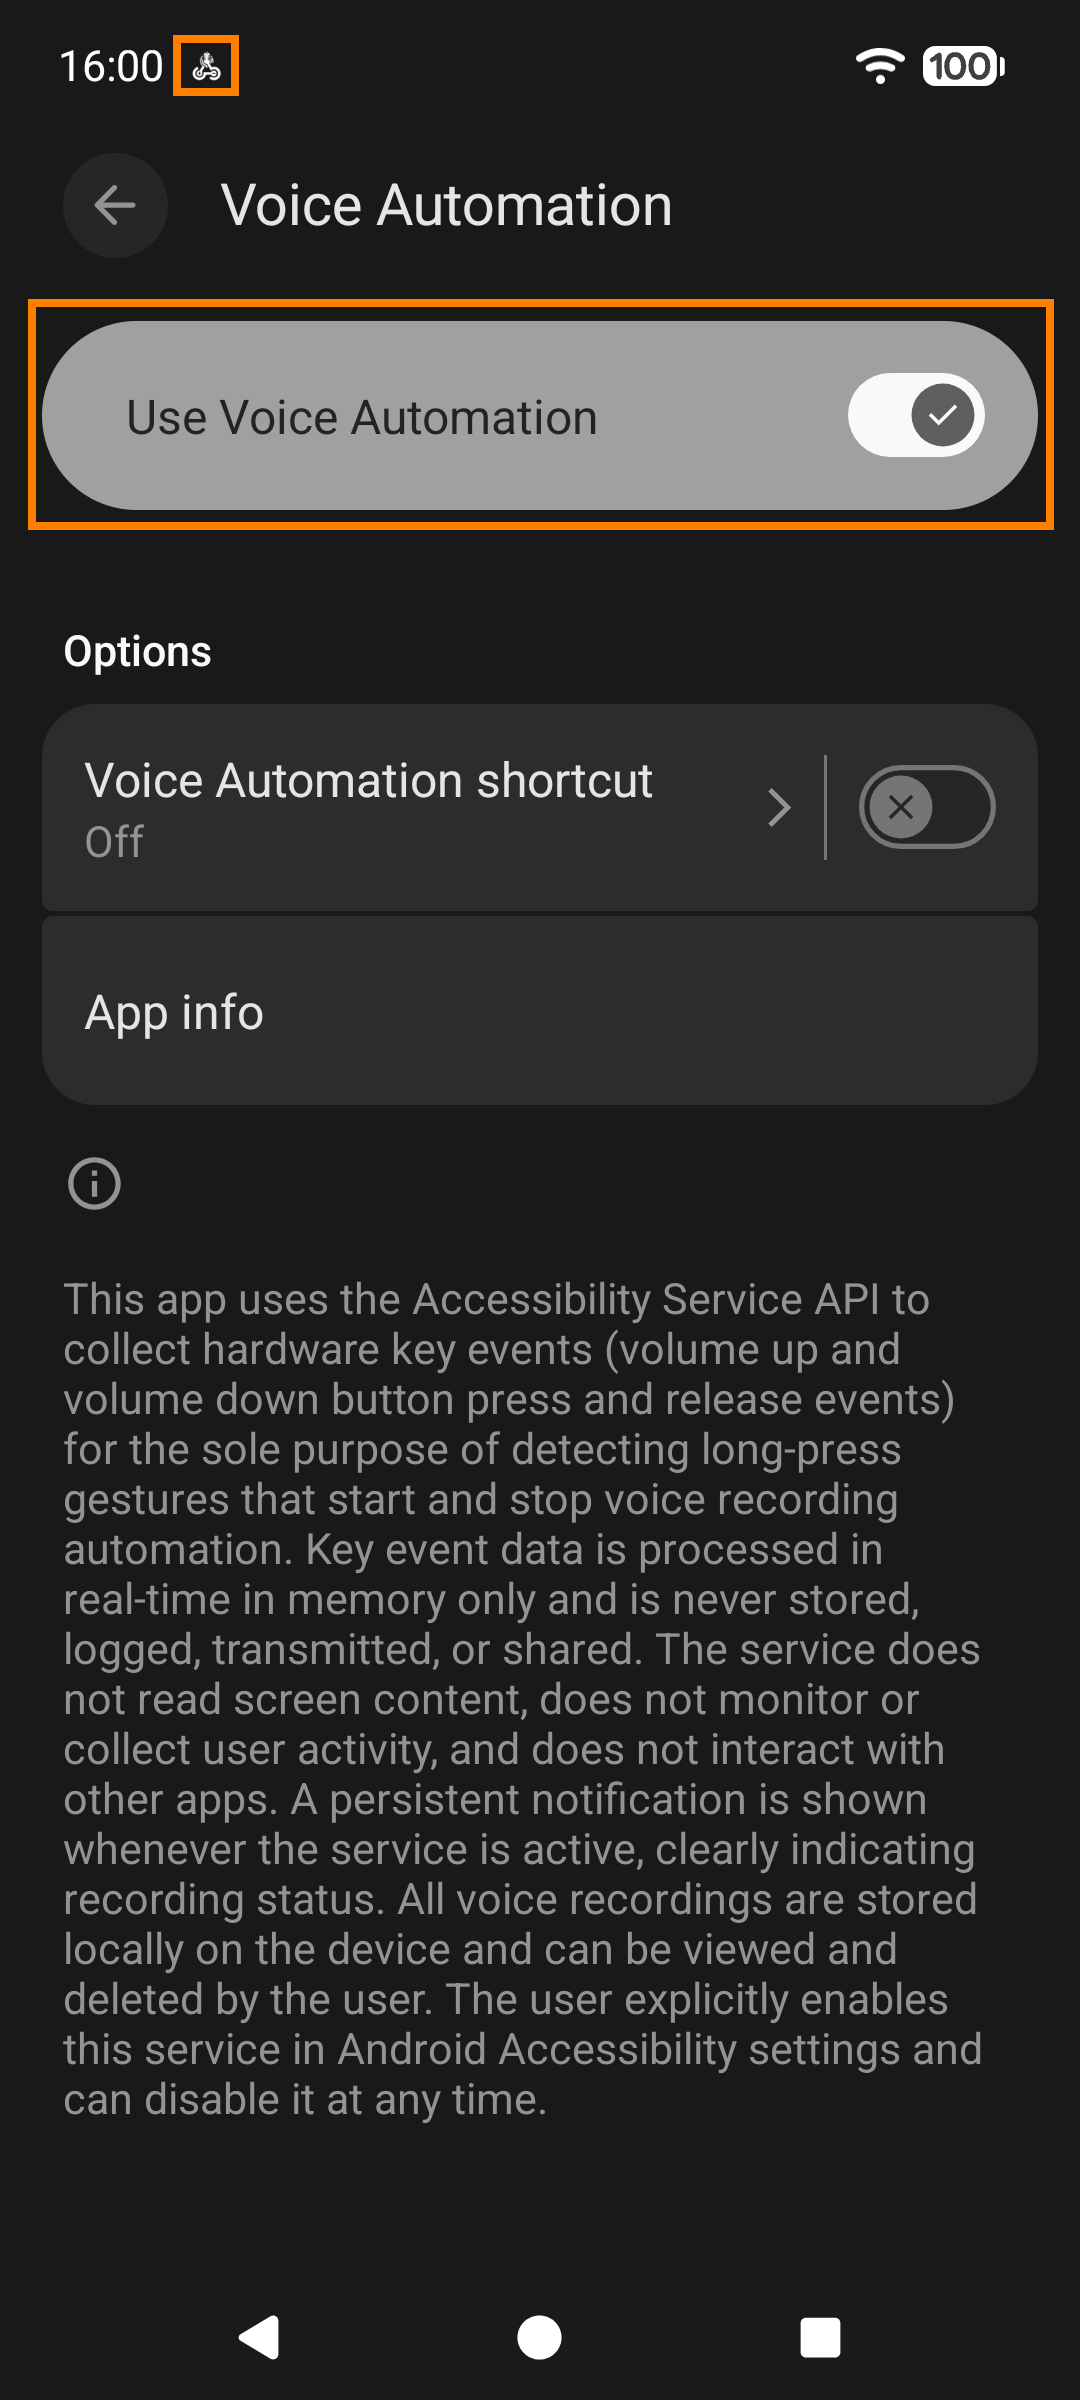
After application installation, your settings screen will look like the image below. The first step is to enable all required permissions.

Voice Automation v1.32.0
Make sure your Accessibility Service is activated which will cause app icon appear in status bar.
Voice Automation v1.32.0
If you've done everything correctly, the Permissions section on the Settings screen should look like the image below. A green Active icon will be displayed on the main screen.
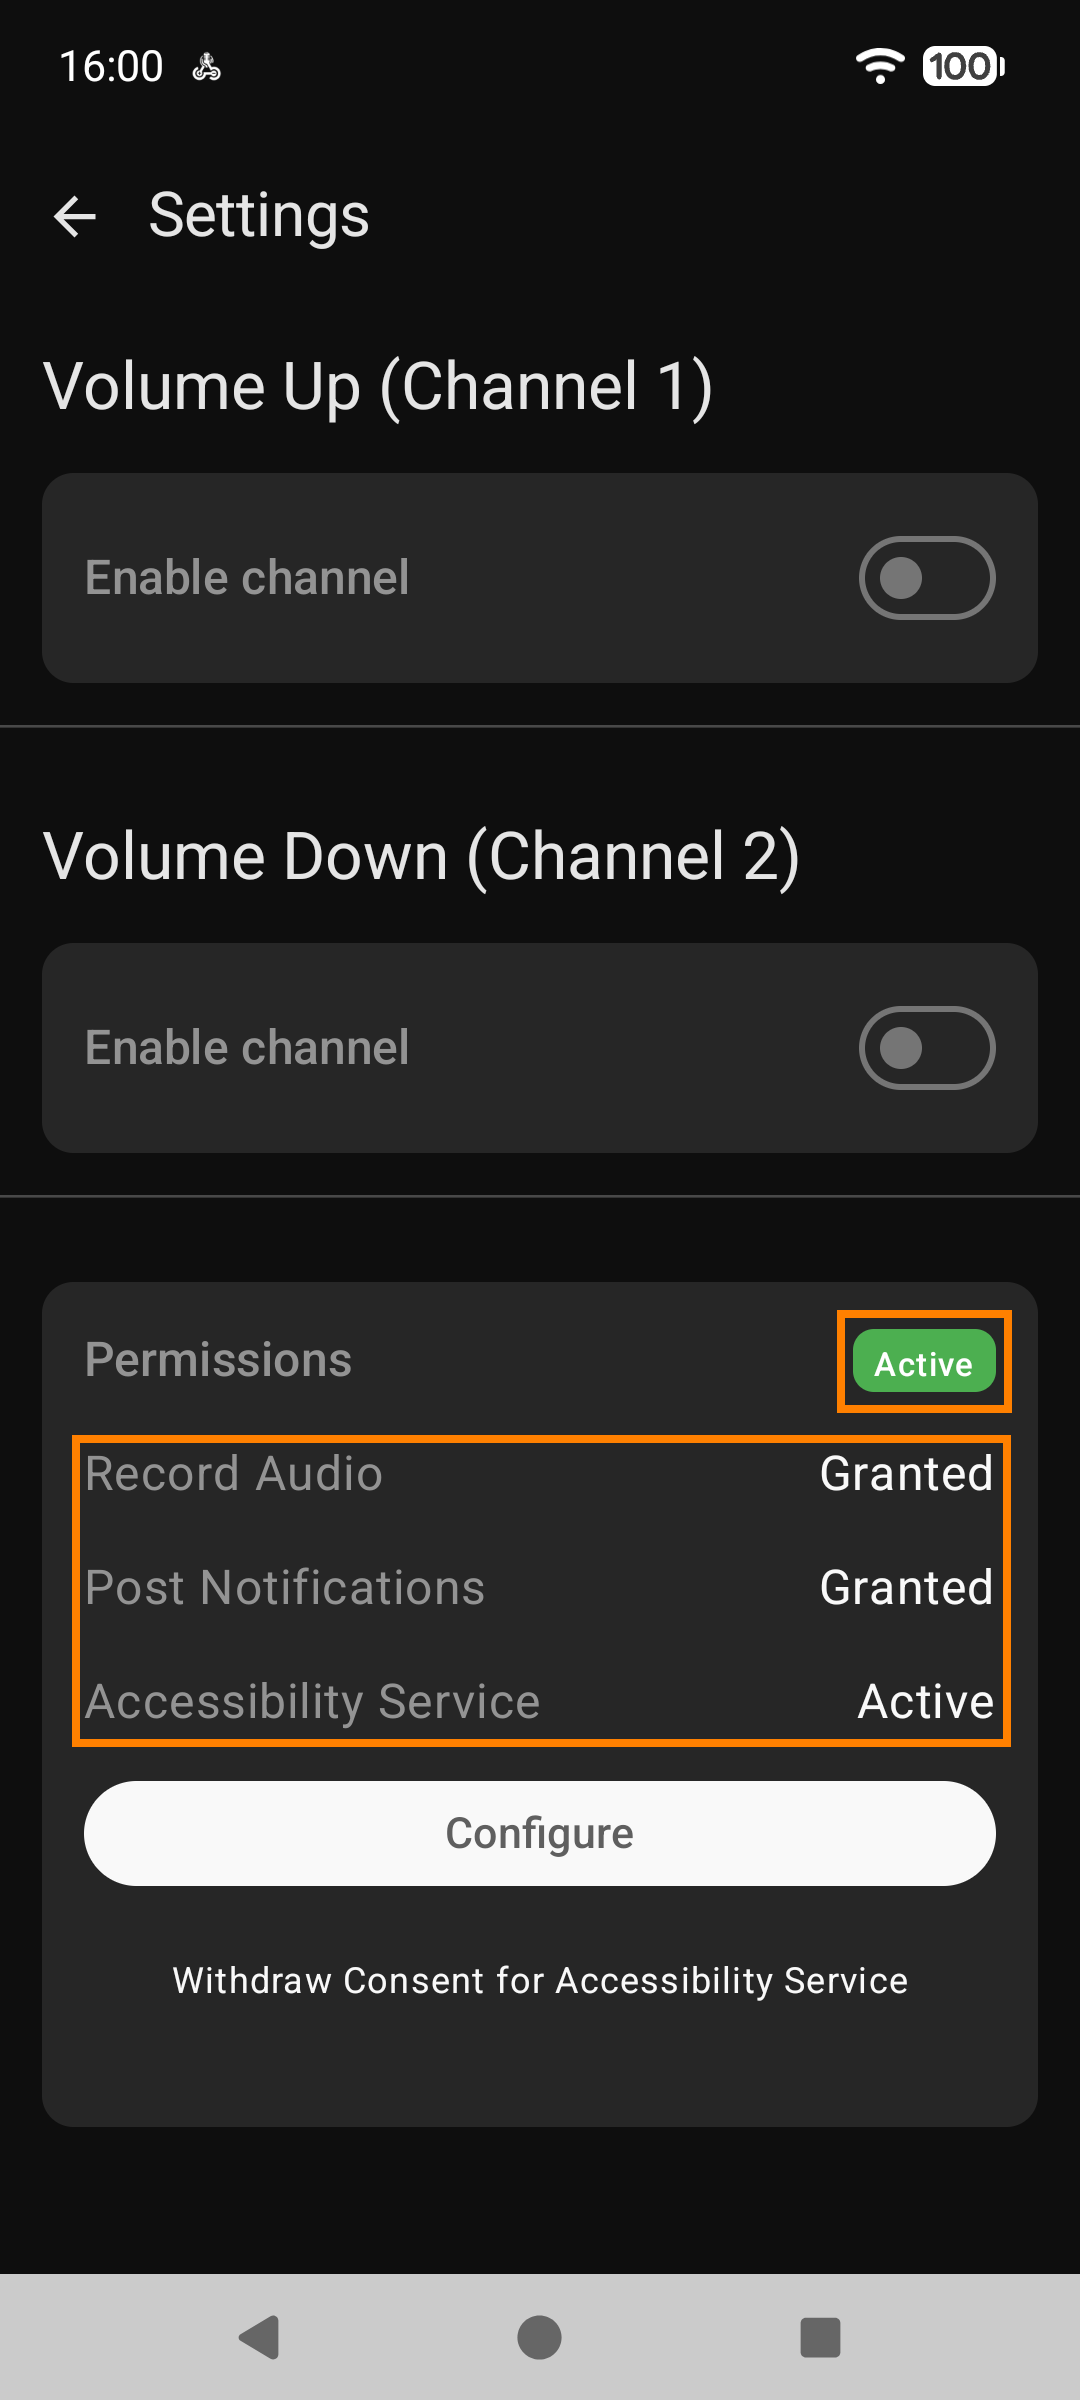
Voice Automation v1.32.0

Voice Automation v1.32.0
1.2. Channel configuration
To send audio to your automation (n8n, Make.com, Python, etc.), you need to specify the webhook URL. To do so, enable the channel and paste the webhook URL from your automation. Don't forget to verify the HTTP method.
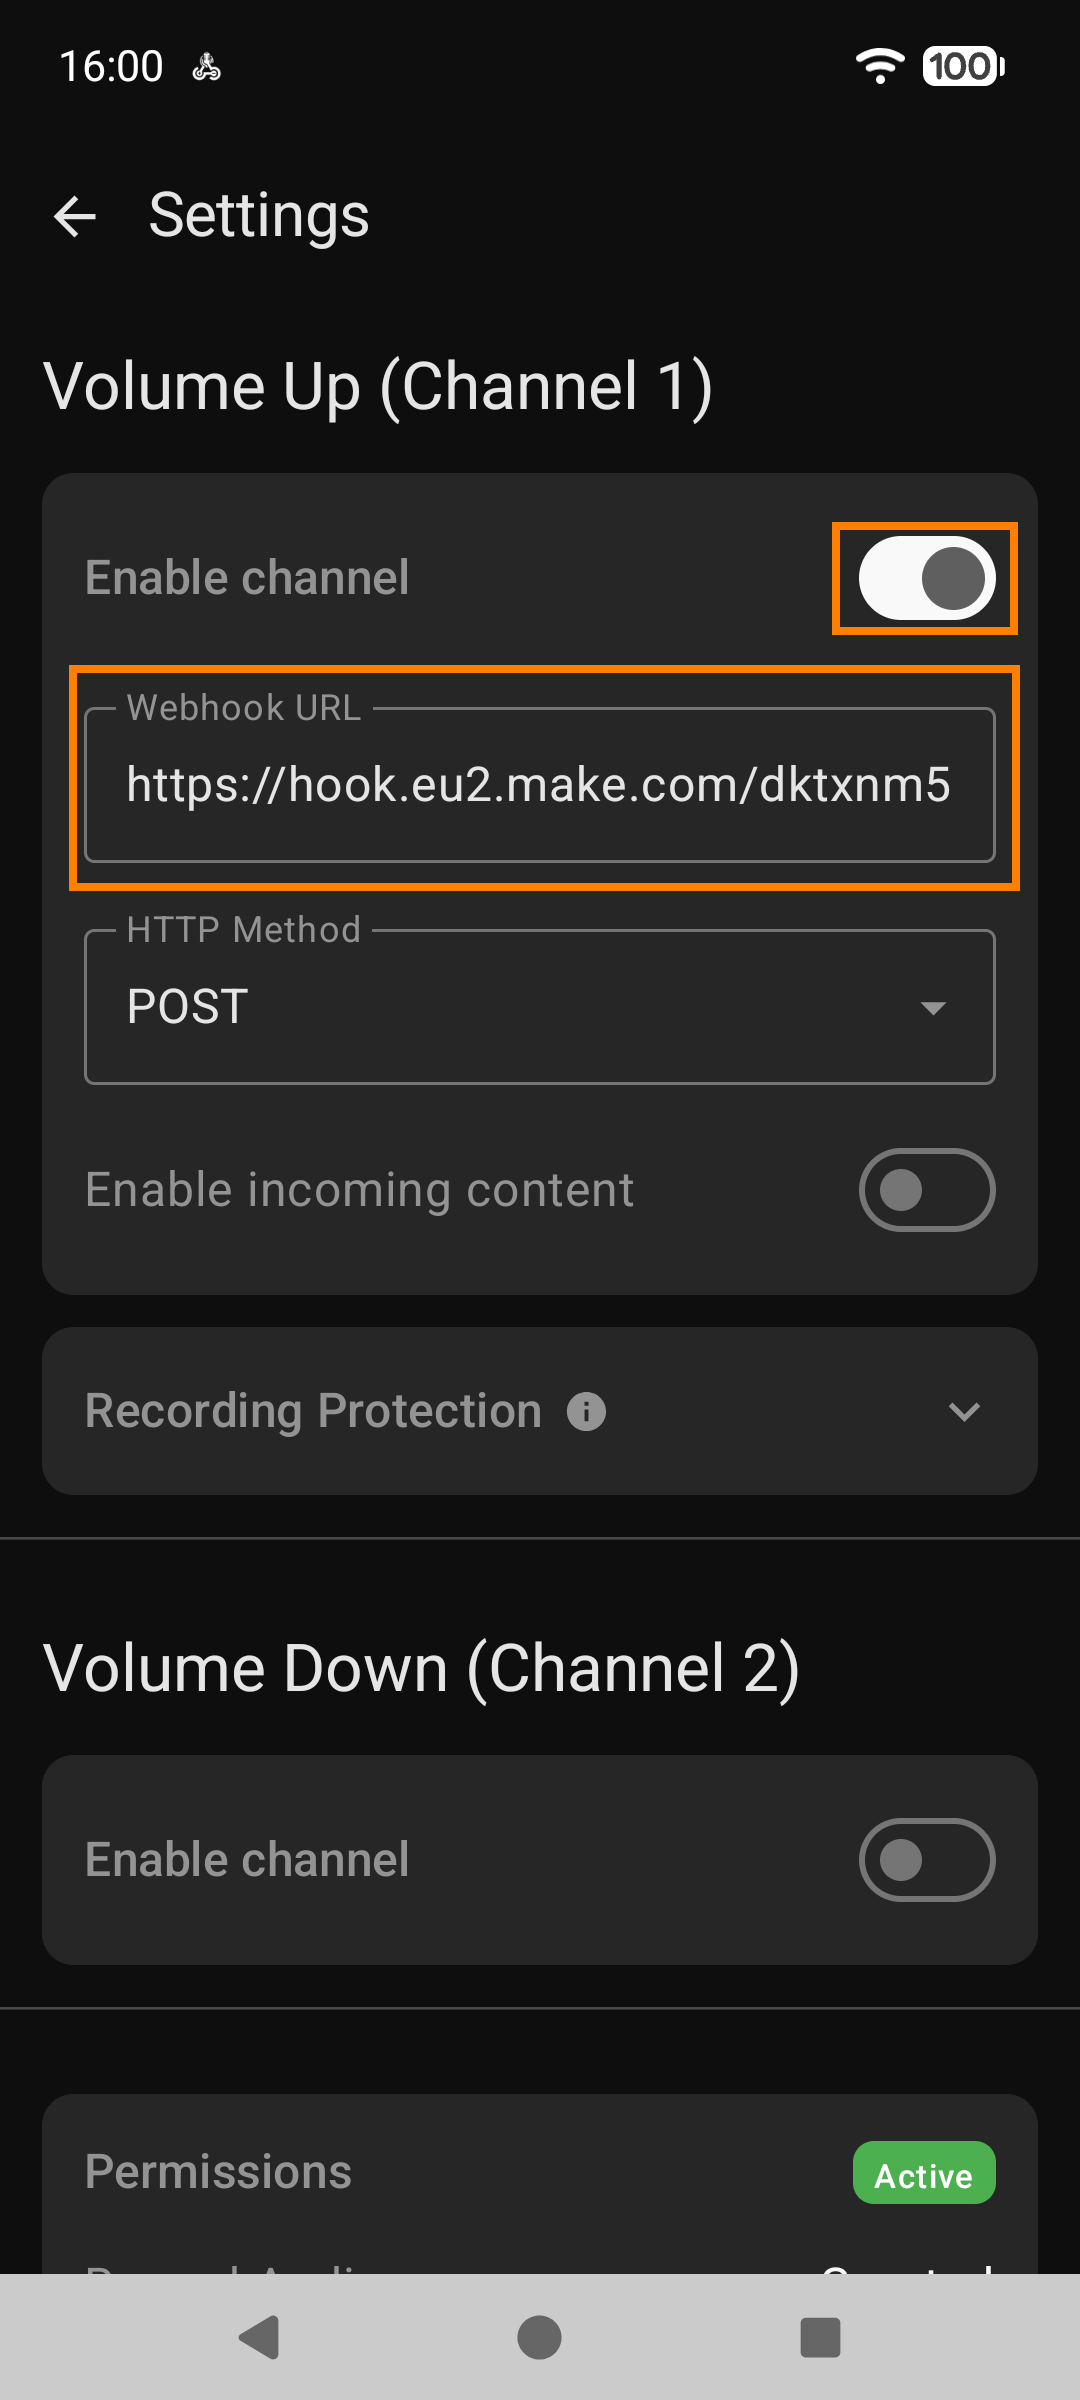
Voice Automation v1.32.0
If you're expecting a response from your automation (voice assistant), enable incoming content and auto-play.
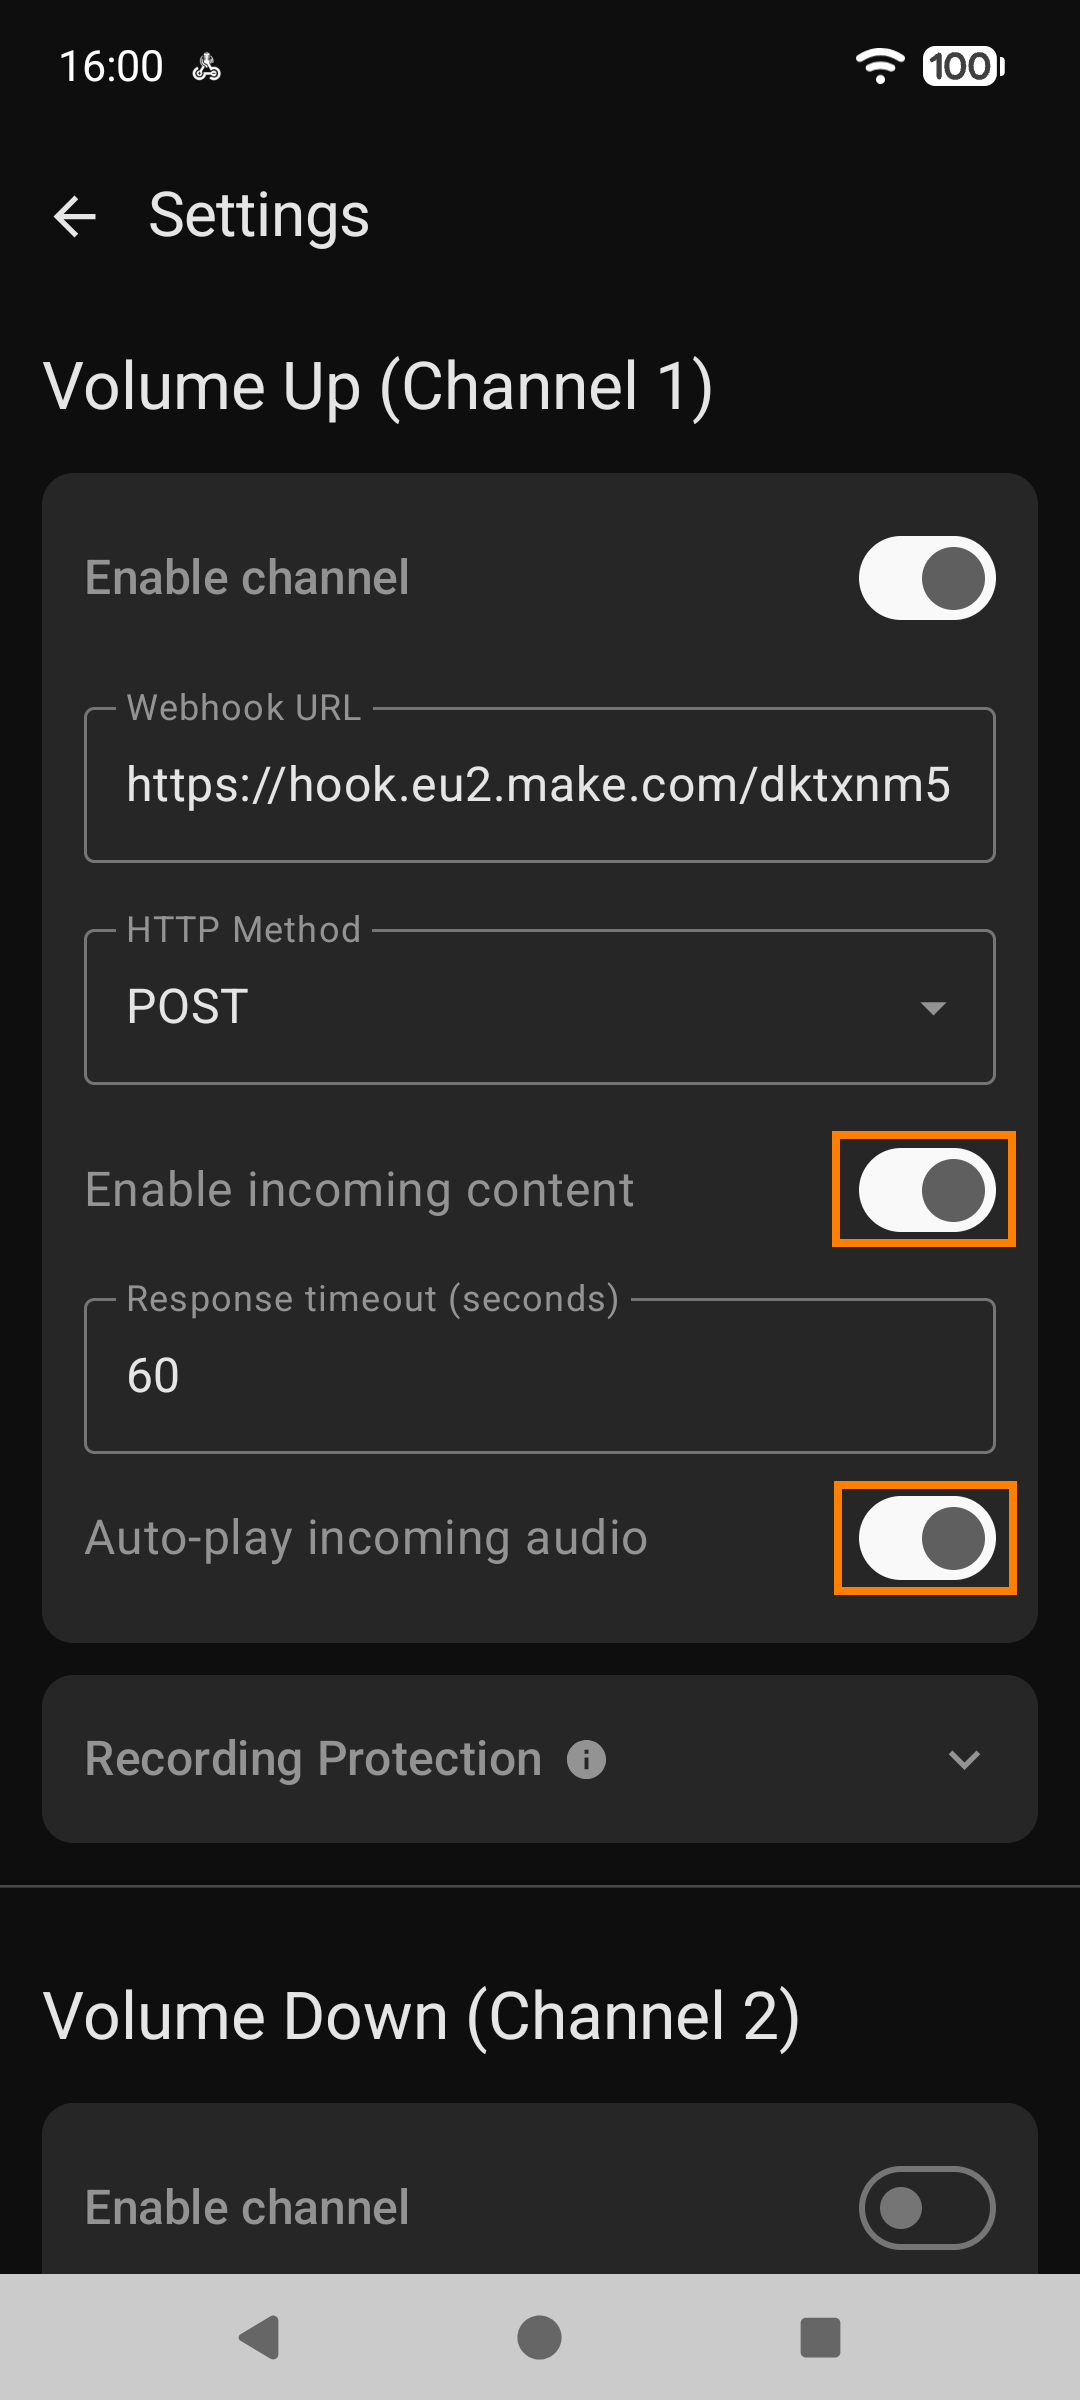
Voice Automation v1.32.0
2. How to use
Voice Automation runs in the background, so you can start recording even on the locked screen. To send a voice command:
Long-press the volume up button until it vibrates (then release) to start recording on channel 1.
Record your audio (ask a question or give a specific command, depending on your automation).
Long-press the volume up button until it vibrates (then release) to stop recording on channel 1 and send the audio to the webhook.
Note: A long press of the volume down button (opposite button) also stops recording but doesn't send the audio (use it, e.g., if you think your voice command wasn't what you intended).
3. Important notes
3.1. Long press habit
Keep in mind that a long press starts/stops recording. At first, it might feel unnatural since you typically press and hold the volume up/down buttons to adjust volume. Now this functionality is reserved for Voice Automation, so from time to time, when you want to quickly increase the volume, you might unintentionally start recording. This is just a matter of habit—you'll get used to it. To quickly adjust volume, slide your finger over the volume slider or quickly press the volume button several times.
3.2. Deep sleep wake up
When your phone's screen is completely off, Android puts it into a deep sleep to save battery. In this state, volume button presses are handled by the system itself and don't reach apps - including this one. To start recording, first wake your phone by tapping the screen, pressing the power button, or picking it up. Then long-press the volume button within a few seconds.
Tip: If the screen turns off too quickly, you can increase the delay in your phone's settings: Settings > Display > Screen timeout (set to 15 or 30 seconds for easier use).
3.3. App works like a chat app
You wouldn't run two video calls from different apps at once—one would glitch or stop. Similarly, don't start recording in Voice Automation while on a video call in another communicator app.
3.4. Response timeout
If your automation sends a response upon completion, you can receive and auto-play it. The response timeout is 60 seconds by default, but it can be changed. It all depends on your workflow—how complex it is, how many AI modules you use, and what type of model you use—so the response timeout may require individual adjustments.