Try It Yourself: See How It Works
When I personally start working with a new tool, my first instinct is to test it myself—see if it actually works as the author claims. I imagine some of you will want to try out the application, feel how it works, and run a basic test: a truthfulness check of the author. To make this step easier, I’ve prepared a very simple automation for both Make and n8n that simply returns whatever you send to it.
Automation Setup - n8n
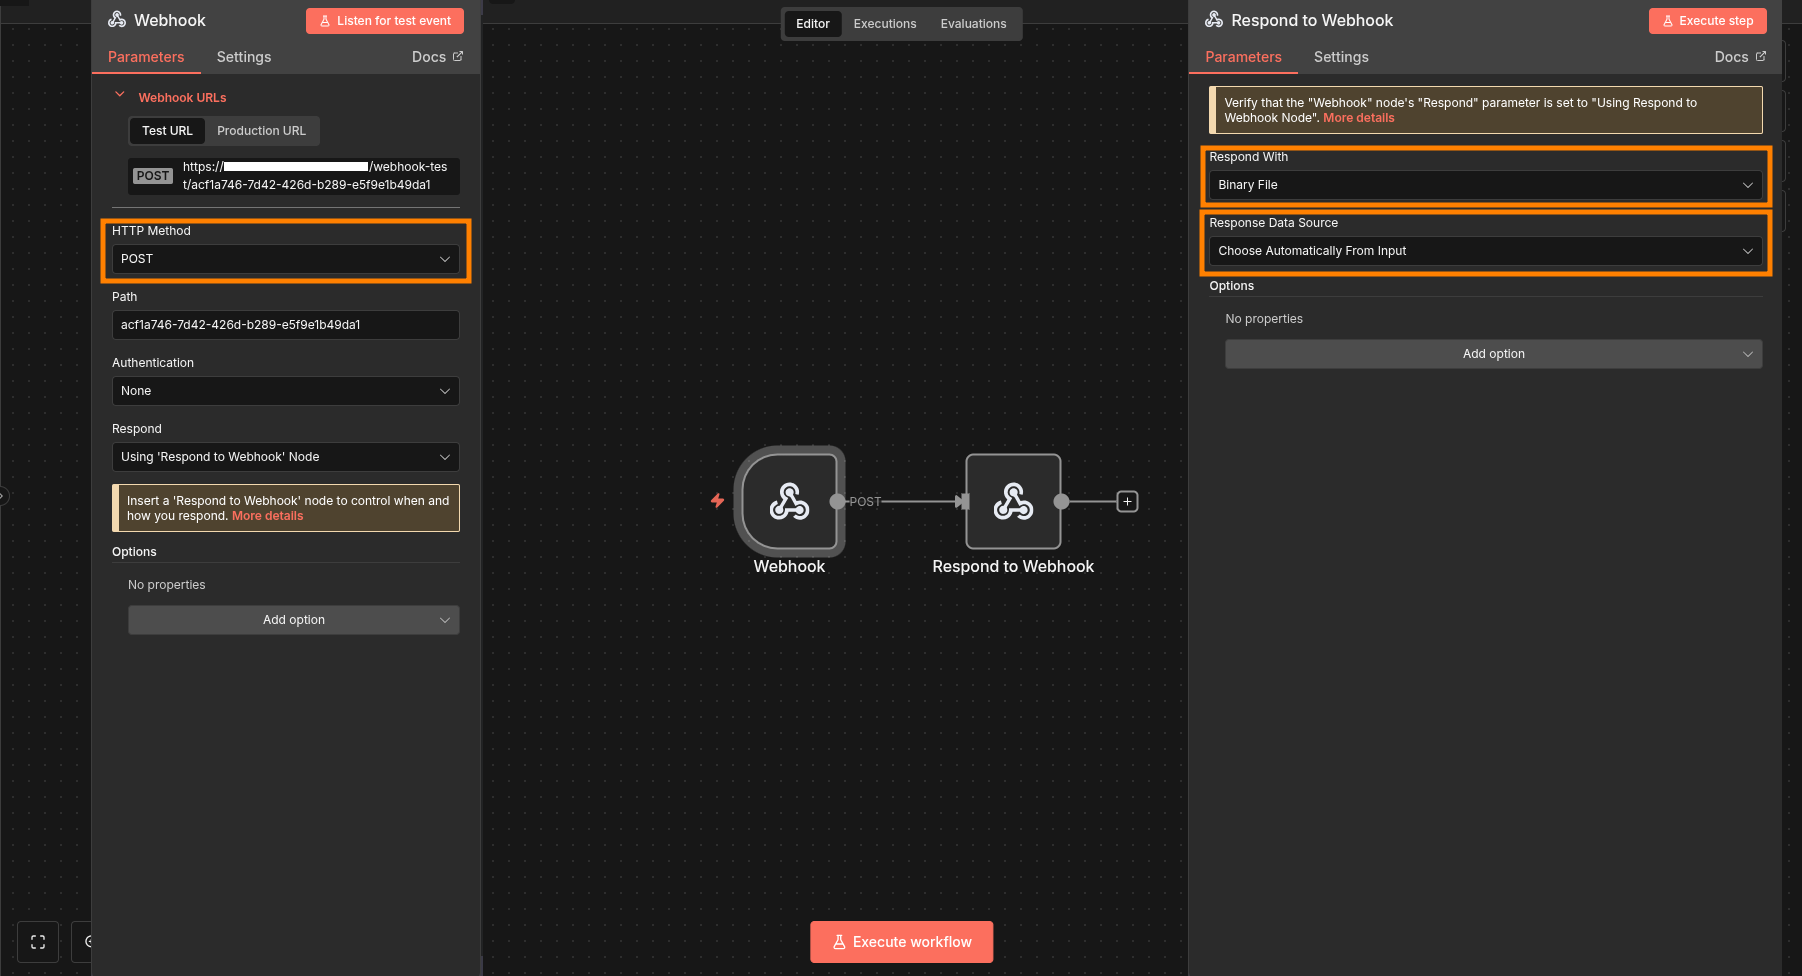
Below screenshot shows the basic automation setup in n8n. On the left, you can see the Webhook module connected to the "Respond to Webhook" module, with the configuration details displayed.
Pay attention to the HTTP method—it should match the one used in your application. Copy the webhook URL from n8n and paste it into your application settings.
In the "Respond to Webhook" module, select "Respond with Binary Data" and set the "Response Data Source" to "Choose Automatically From Input." This ensures the automation returns exactly what it receives.
Configure Your App
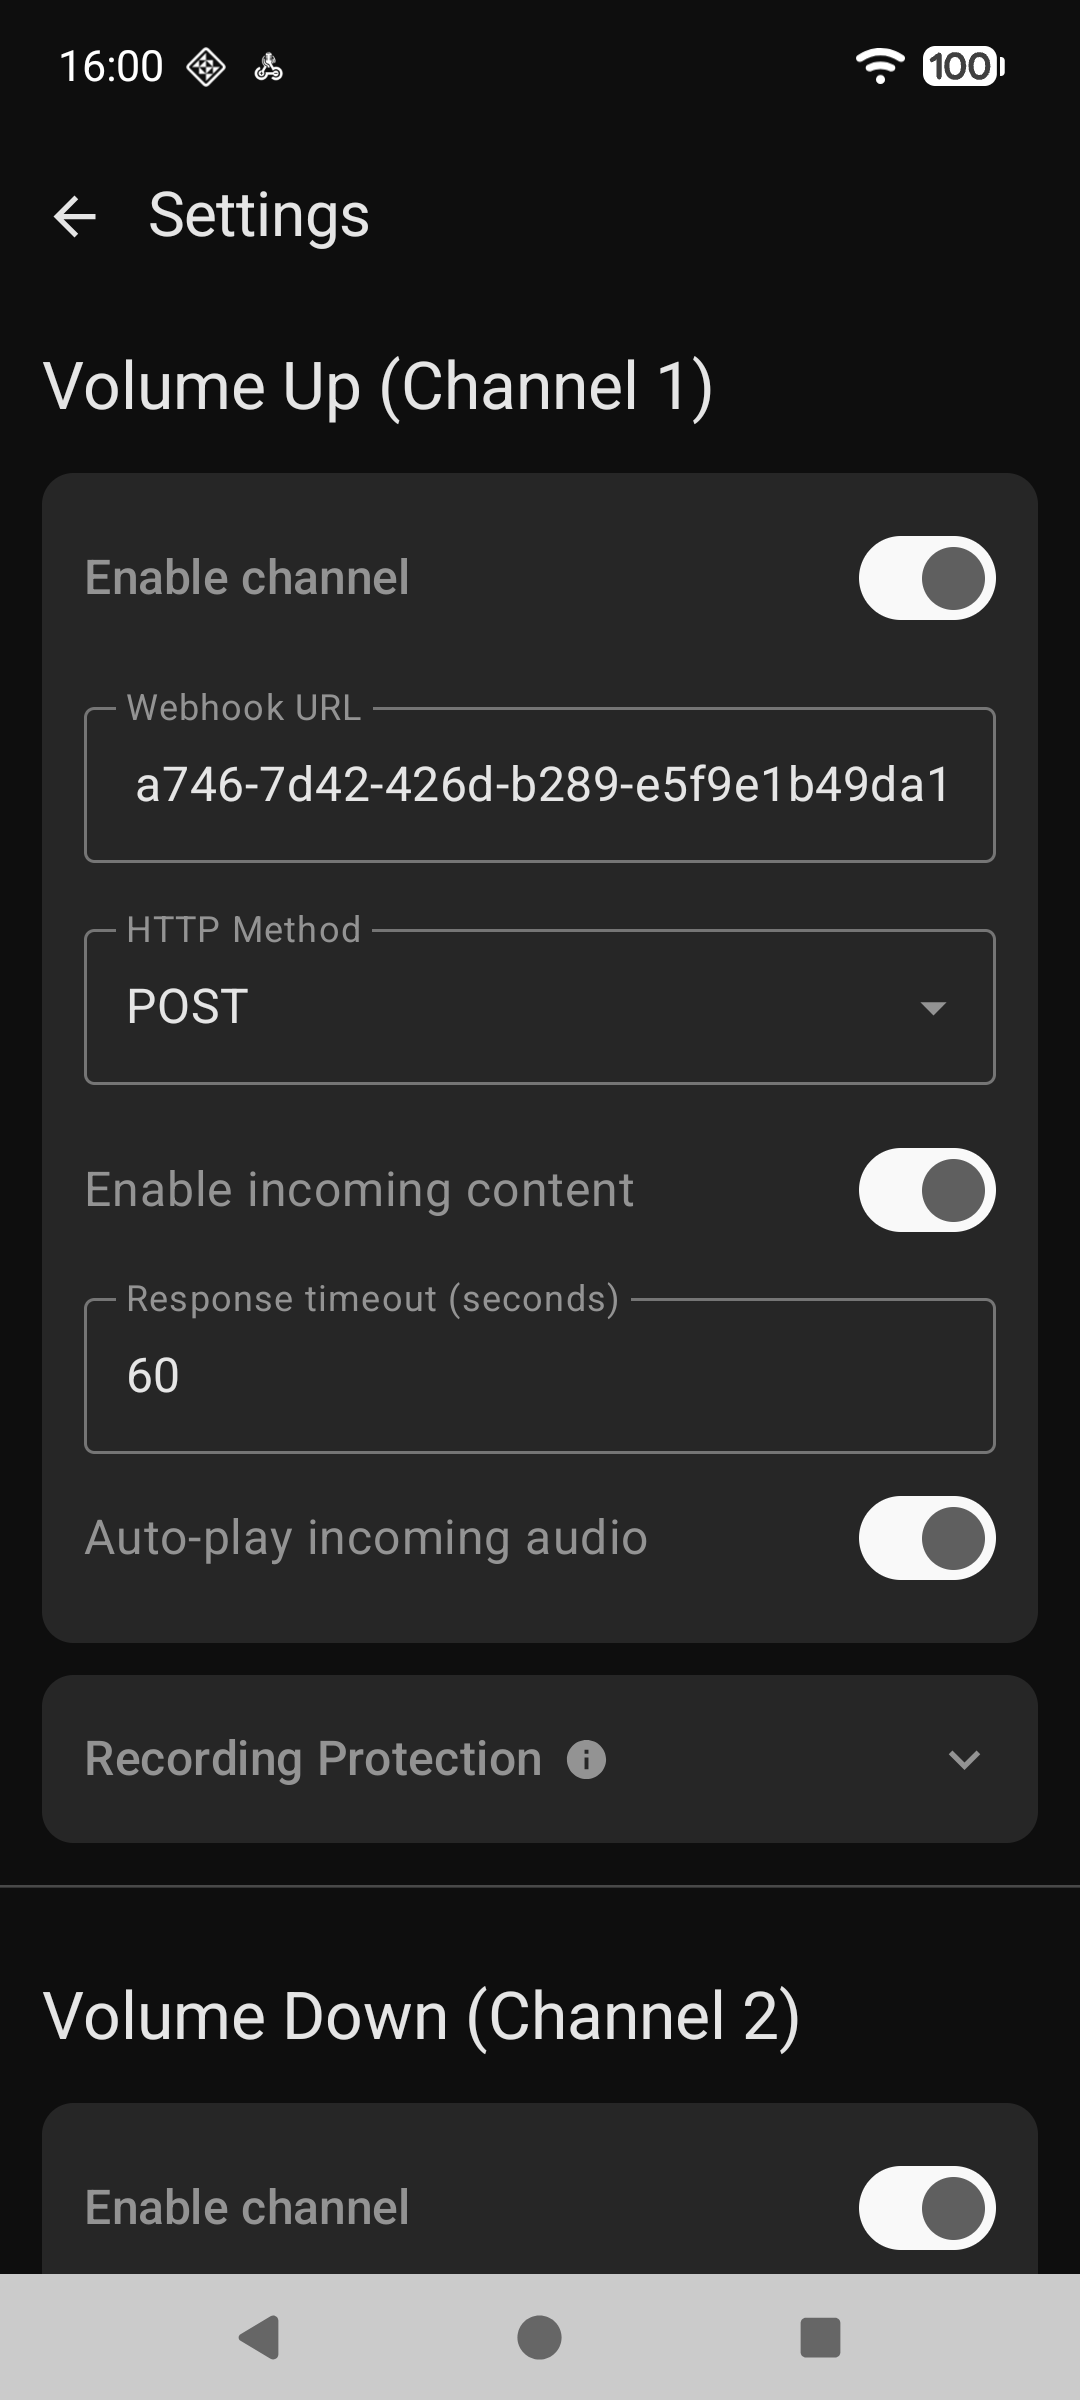
Below is a screenshot of the application interface. To connect it with your automation:
- Unlock the channel.
- Paste the webhook URL into the "Webhook URL" field.
- Make sure the HTTP method matches the one used in your automation.
- Since the automation returns audio, enable both "Enable Incoming Content" and "Auto-Play Incoming Audio" options.
This setup ensures your app receives and plays back the audio sent by the automation.
Automation Setup - Make
On this screenshot, you can see the automation built in Make. The workflow uses the "Custom Webhook" module as a trigger and the "Webhook Response" module to send back the audio.
- In the "Custom Webhook" module, no HTTP method needs to be selected—it’s detected automatically. Advanced settings remain disabled.
- The "Webhook Response" module requires a header so your app knows what type of data to expect. Set the Content-Type to audio, but instead of typing it manually, use the dynamic value received in the "Custom Webhook" module.
- In the Body section, select the file received in the trigger module (it’s already attached and ready to be sent back).
This setup ensures your automation sends audio in the correct format, and your app can process it seamlessly.

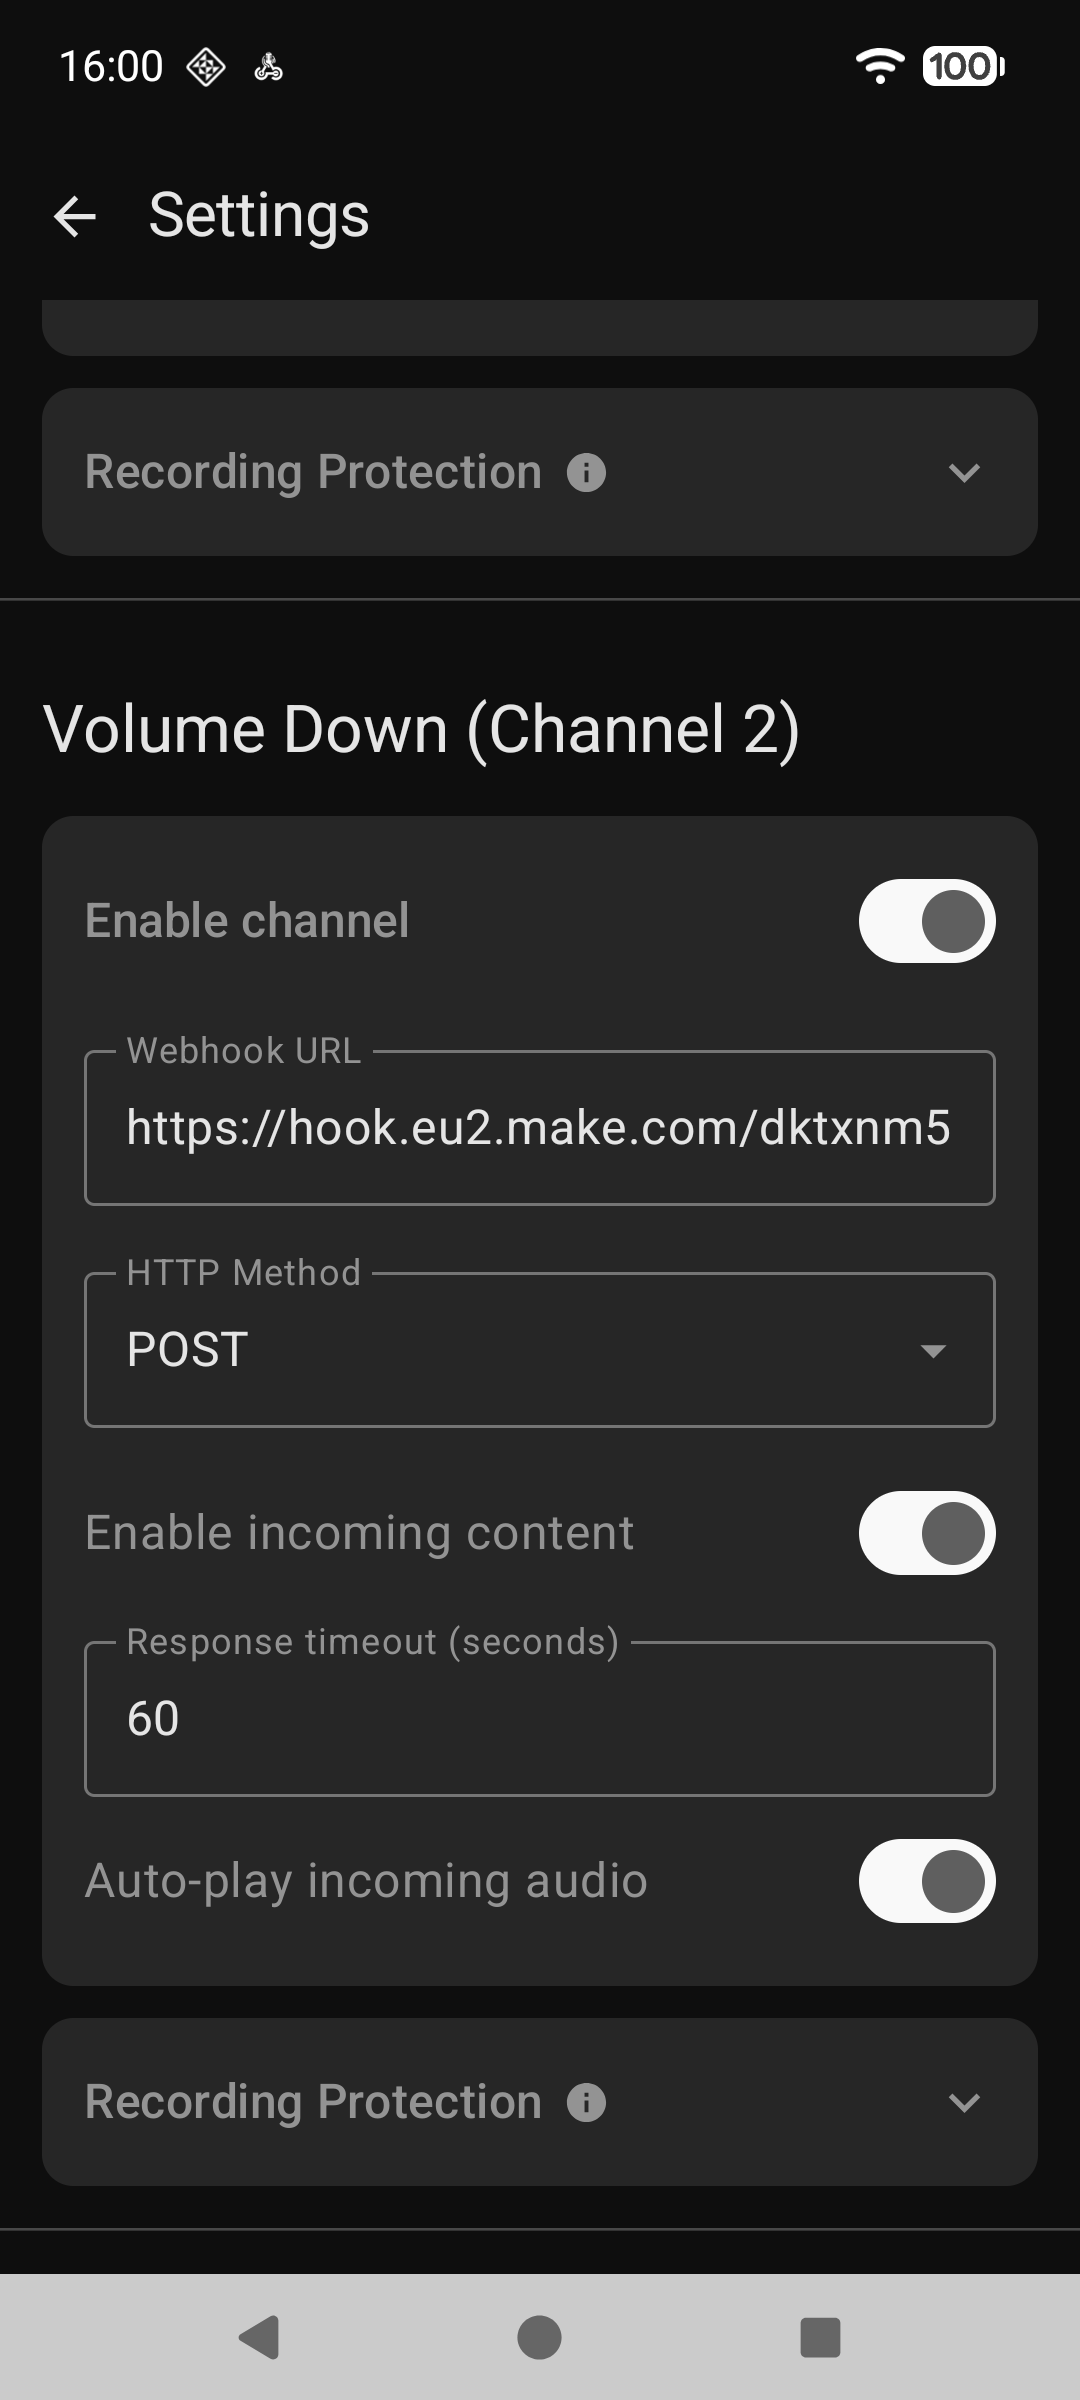
Configure Your App
The application settings shown here are identical to those used with n8n. To set up the connection:
- Activate your channel.
- Paste the webhook URL.
- Allow the app to receive and automatically play back the response.
This ensures your app is ready to interact with the automation and handle incoming audio as expected.
Try it yourself
Now that you’ve seen how everything works, I encourage you to test the automation for yourself. To make it even easier, I’ve prepared ready-to-use automation templates for both Make and n8n. Just download them using the links below and import them directly into your workspace. This way, you can quickly check if the solution works as described and adapt it to your own needs.
Download Make automation
Download n8n automation
Download Action Button - Voice Automation